Accounting
Purchase
Sales
Orders
Inventory
Returns
Sales Force Physical Returns
Schedule a Physical Return
Capture a Physical Return and Print a Returns Checking Slip
Validate a Physical Return
Create a Distributor Credit note
Sales Force Virtual Returns
Capture a Virtual Return and Print a Returns Checking Slip
Validate a Virtual Return
Issue a Distributor Credit note and Re-Invoice
Return to Supplier
Return to Supplier (Manual)
Internal Breakages
Distributor Breakages (Replacement)
Capture a Distributor Breakage (Replacements) and Print a Return Checking Slip
Validating a Distributor Breakage - Replacement
Distributor Breakages (Credit Note)
Capture a Distributor Breakage and Print a Returns Checking Slip
Validate a Distributor Breakage (Credit Note)
Create a Distributor Breakage Credit note
Adjustments
Corrections
Products
Manufacturing
Attendance Register
Help
Additional Help
Installing Odoo as an application
Two Factor Authentication Set Up
Automated Signature
How to Register a Guest on BBB - Guest Wi-Fi
Dot Matrix printing - How to and Troubleshooting
How to Log a Support Ticket in Odoo
How to Log a New Feature request Ticket in Odoo
Sales Force
Promotion
Demotion
Pay-In Sheets
Create and print pay-in sheets pack
Register pay-in sheets
Capturing pay-in sheets
Register pay-in sheets distributor summaries
Capturing Pay-In Sheets Distributor Summaries
Create a Cosultant
Activating inactive sales force member
VoIP
Blacklisting
Suspend
Moving Consultants
Sales Force Member Information Edits
PaySpace
Contact Centre
MVNO
How to purchse data, voice, SMS and check the balance on BBB Connect HelpDoc
How to port/transfer your current SIM card number to BBB Connect SIM card
How to Recharge BBB Connect SIM card
TaskFlow
How to set up sales force meetings campaign
Making Inbound and Outbound calls for contacts 'Potential Leads'
How to create a user
How to make a sales force meeting call
How to set up extensions
How to configure sales force meetings
How to set up dispositions
How to set up a recruiting campaign
How to set up call teams
How to call the Leads and Recruits
Campaign Planner
Table of Contents
- All Applications
- Contact Centre
- TaskFlow
- How to configure sales force meetings
How to configure sales force meetings
 Updated
by Thandi Lebeta
Updated
by Thandi Lebeta
Introduction
Once the 'Sales Force Meeting' is configured, the records need to be stored in 'CRM'. The steps below must be followed when configuring the sales force meetings.
Responsible Team
- ICT/ TaskFlow
- Contact Centre Manager
- Contact Centre Team Leader
Navigation
Navigate to your TaskFlow dashboard and click on this application: CRM
Navigate as follows to get to the correct screen:
TaskFlow/CRM
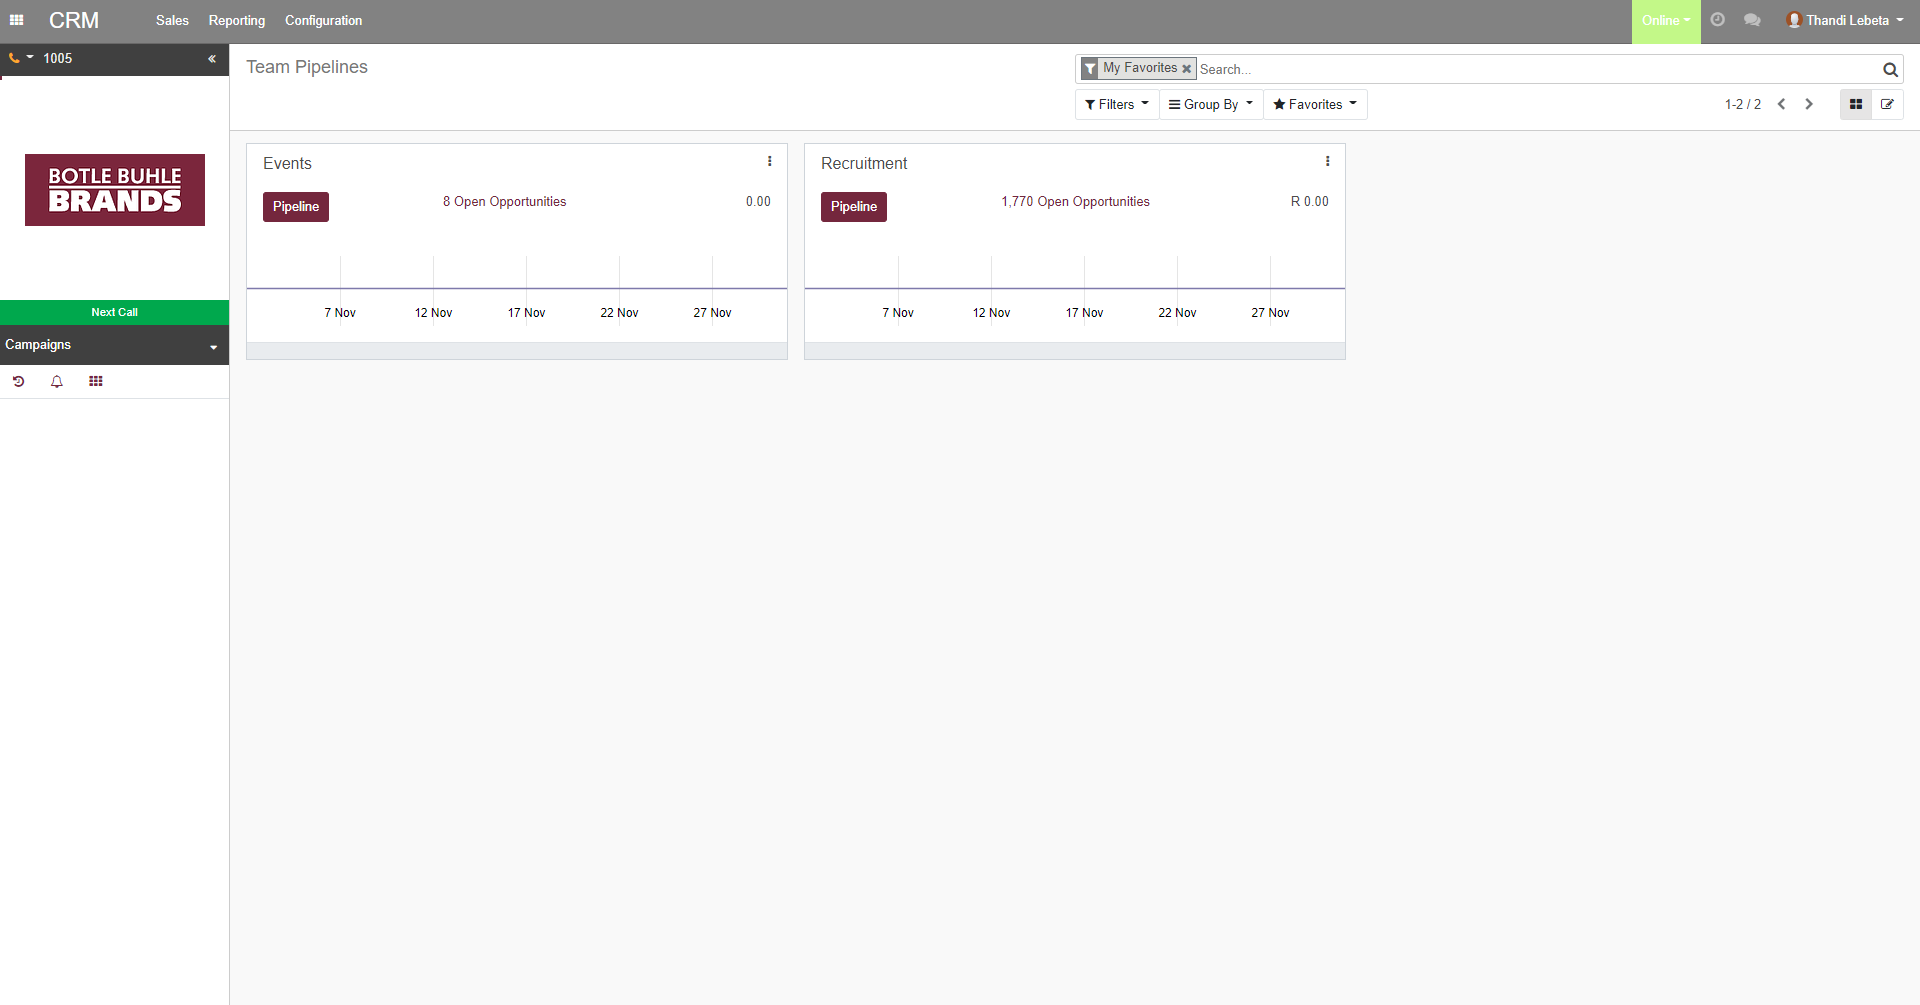
Once the contact centre manager or team leader logs into the system and clicks 'CRM', she will land on a screen that looks like this:
Process
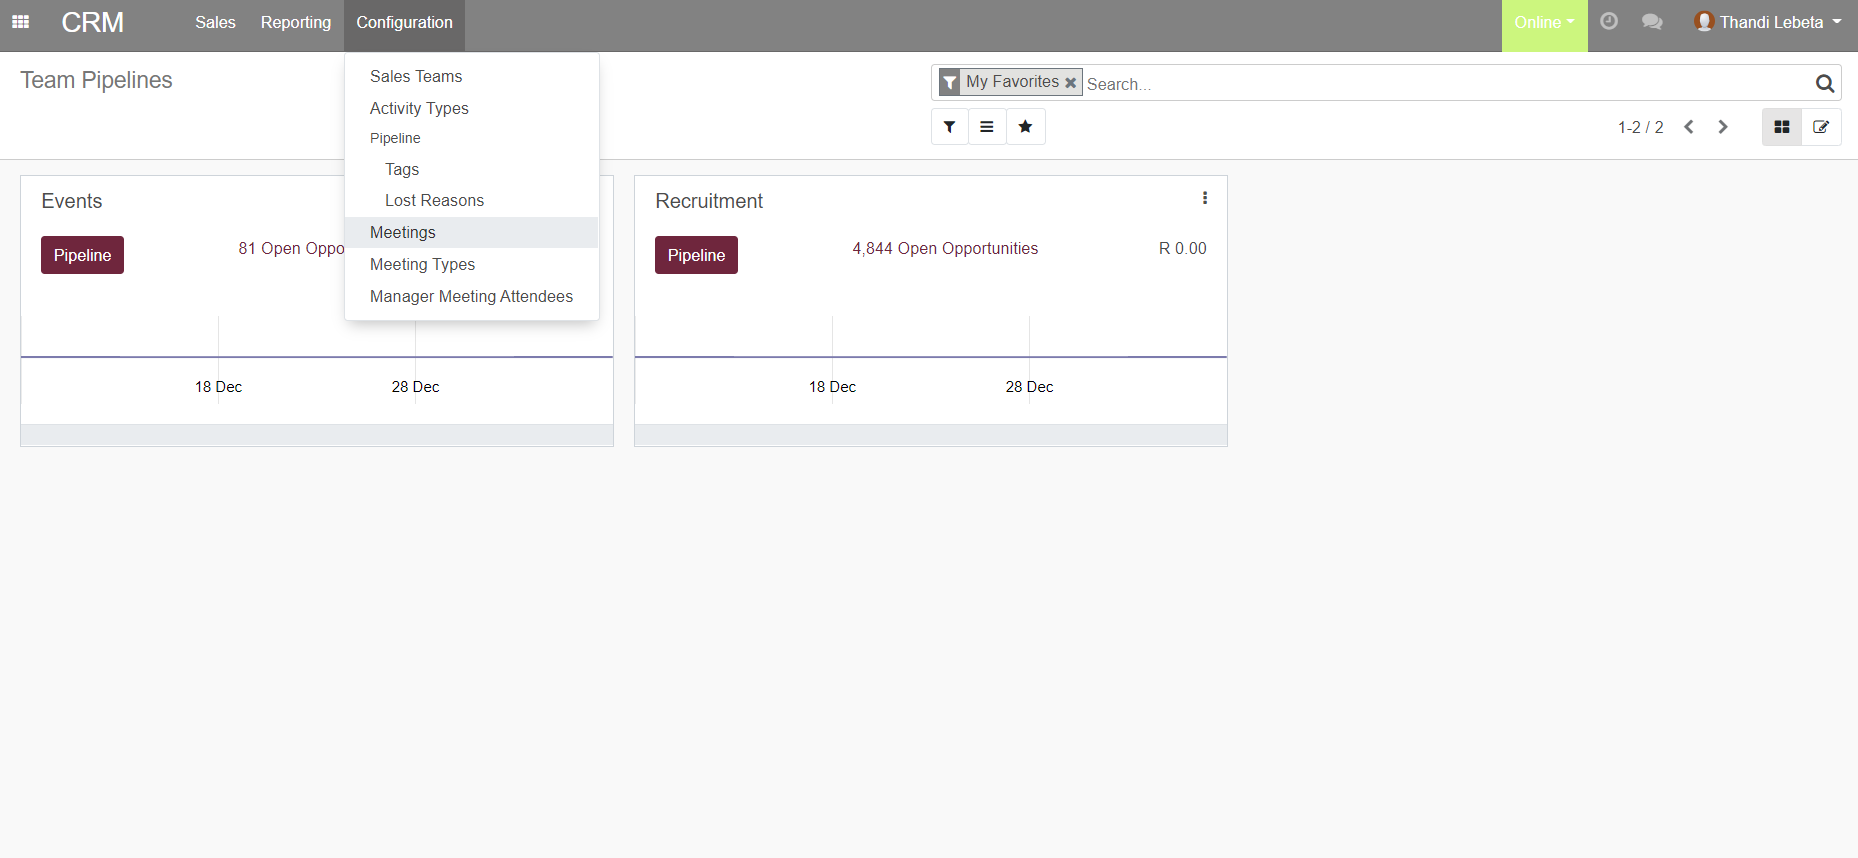
- Click [Configurations].
- Click [Meetings] on the dropdown as shown in a diagram below:
- Click [Create].
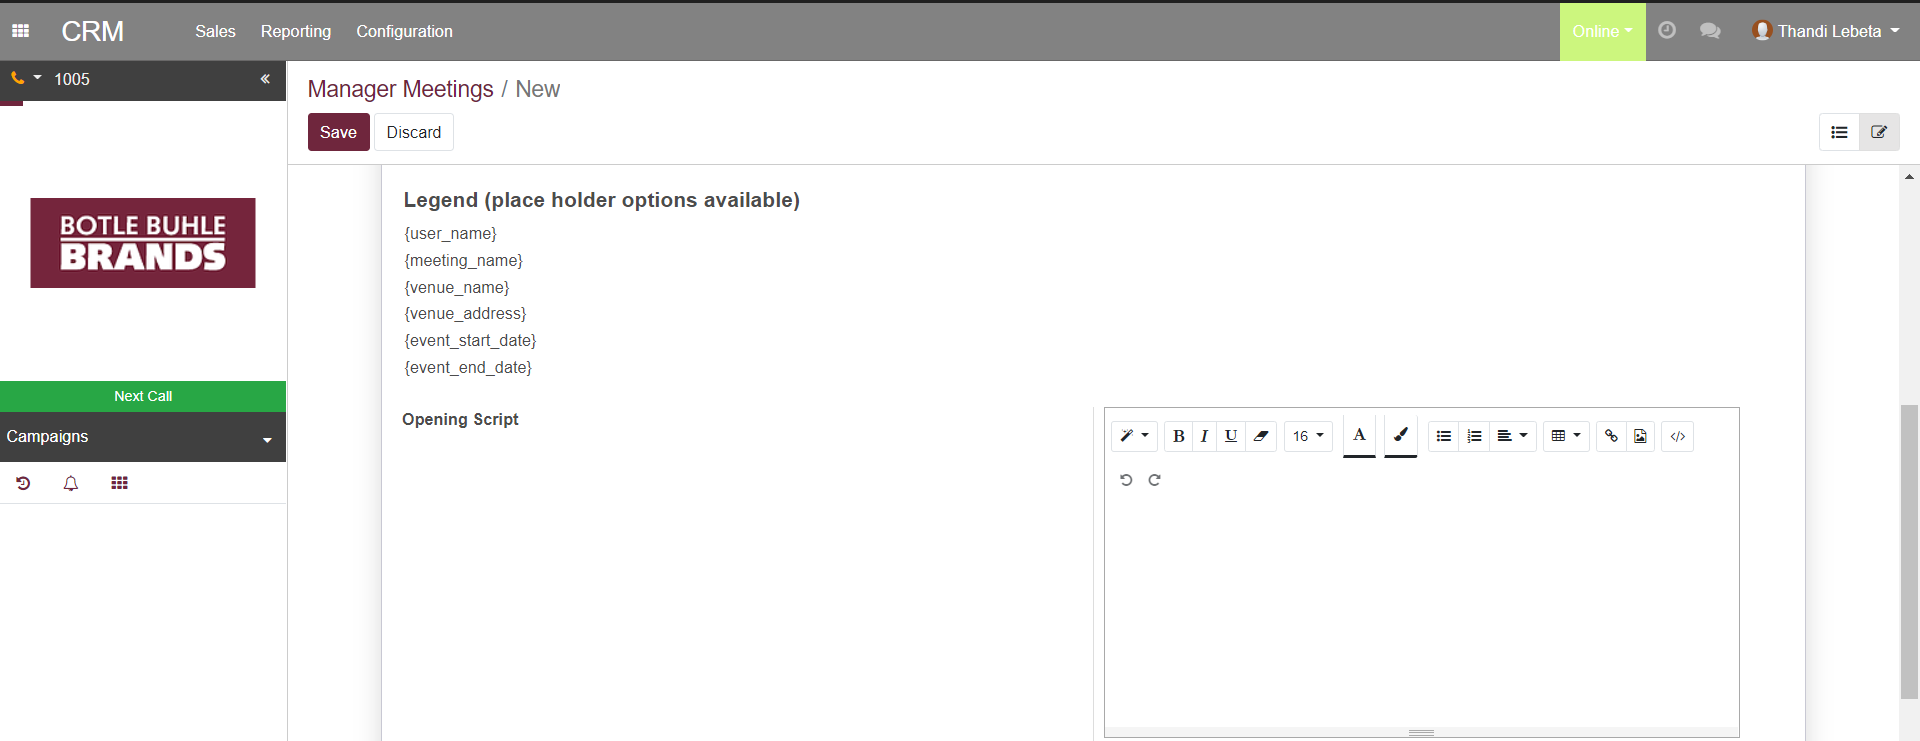
- Enter the following details as shown in the screen below:
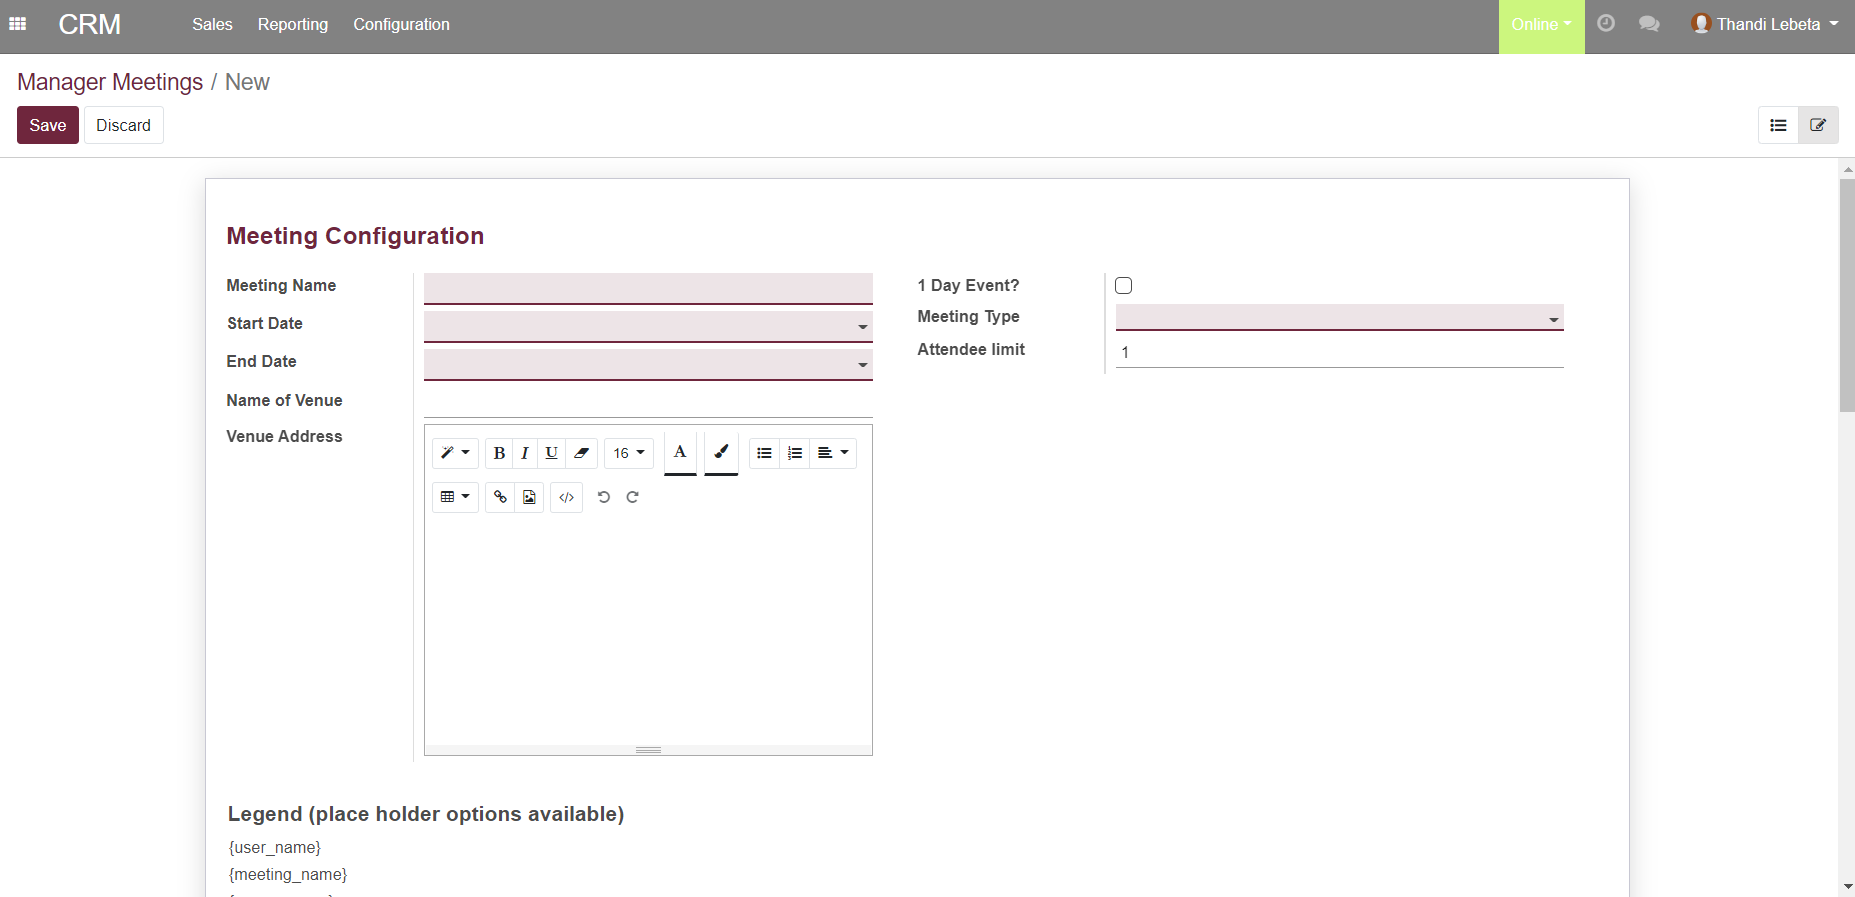
- Enter the 'Meeting Name' on 'Meeting Name' bar.
- Select the 'Start Date' on the dropdown arrow.
- Select the 'End Date' on the dropdown arrow.
- Select the '1 Day event?' check box for a one day event.Once you tick '1 Day event?' check box, the 'End Date' will disappear from your screen.
- Select the 'Meeting Type' on the dropdown arrow.
- The 'Attendee limit' is default to '1'.
- Enter the name of the venue on 'Name of Venue' bar.
- Enter the venue address on 'Venue Address' screen.
- Click on 'Opening Script' screen on your right side of the screen as shown in the diagram below:
- Copy the 'Opening Script' from the previous 'Meetings' as shown below to the blank 'Opening Script'
screen above:
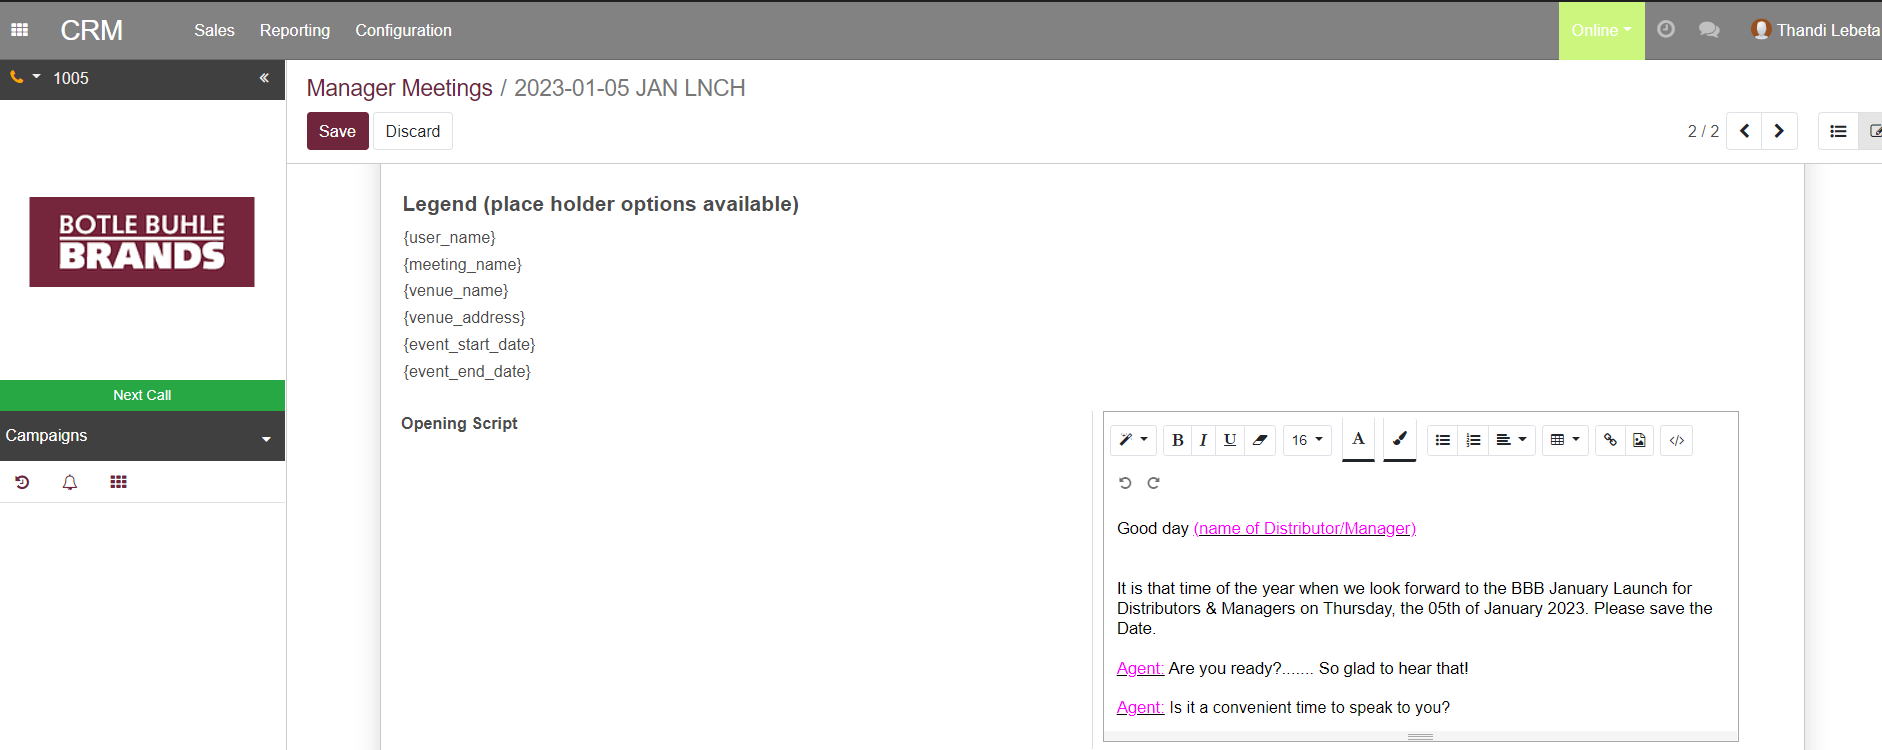
- Copy the 'Opening Script' from the previous 'Meetings' as shown below to the blank 'Opening Script'
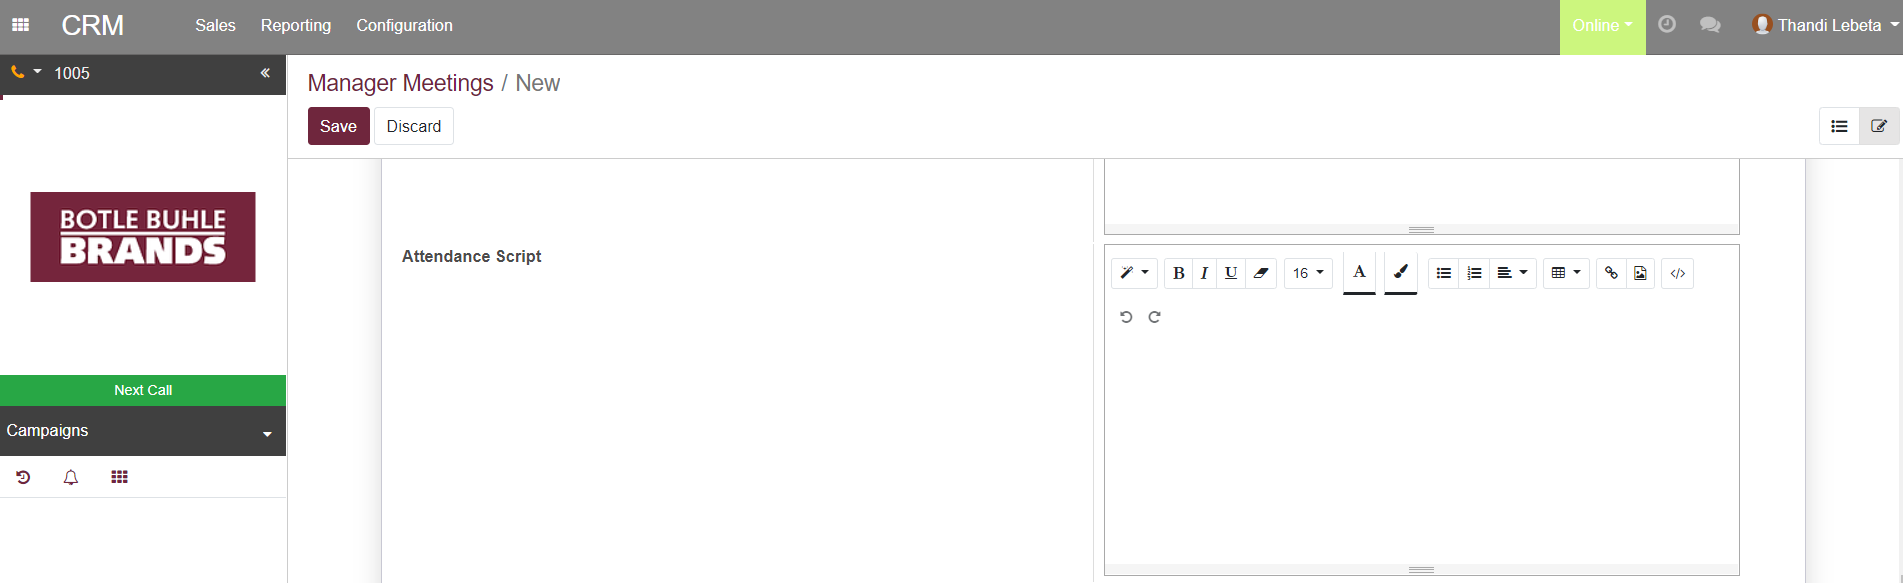
- Click on the 'Attendance Script' screen on your right side as shown in the diagram below:
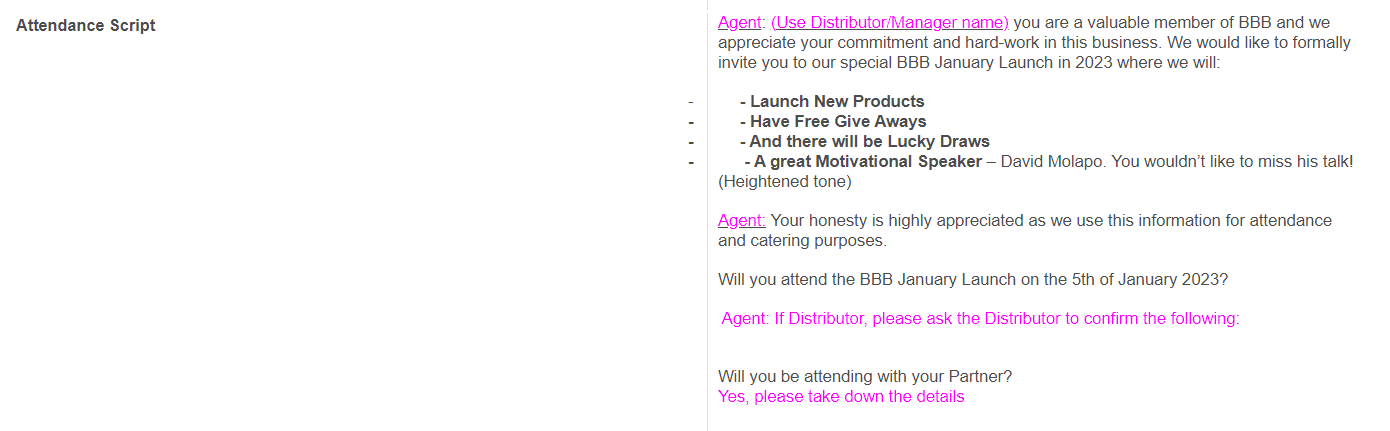
- Copy the 'Attendance Script' from the previous 'Meetings' as shown below to the blank 'Attendance Script' screen above:
- Click on the 'Closing Script' screen on your right side as shown in the diagram below:
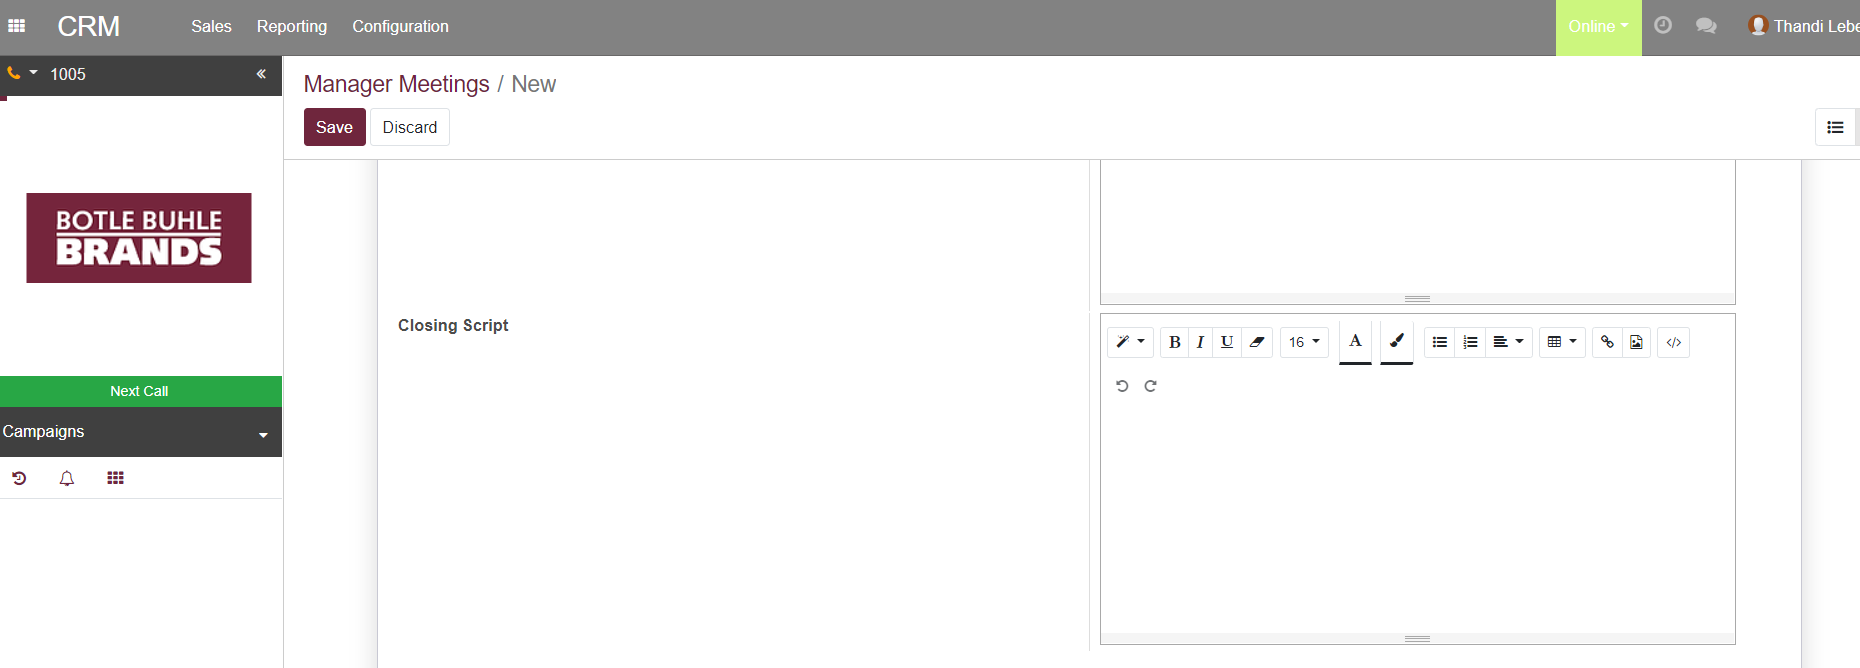
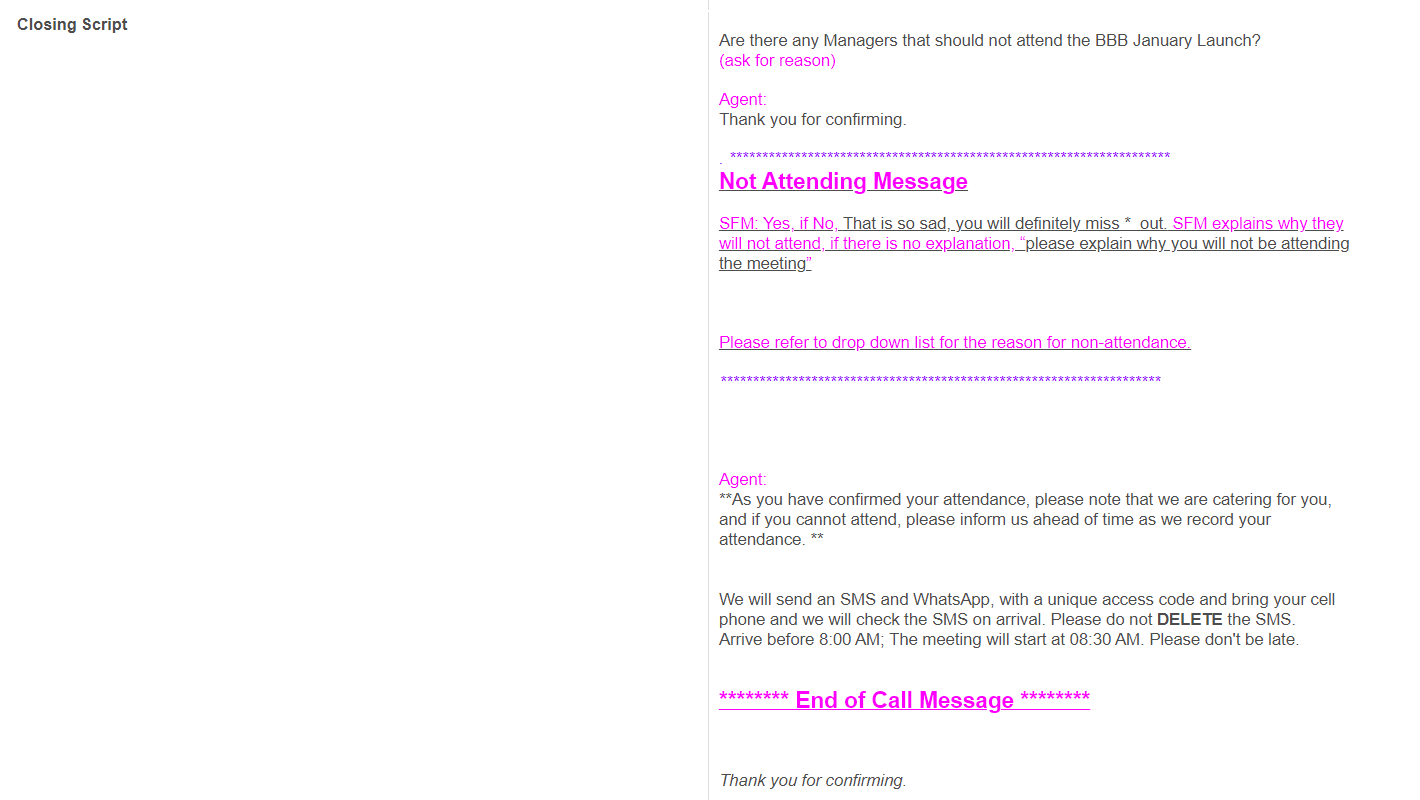
- Copy the 'Closing Script' from the previous 'Meetings' as shown below to the blank 'Closing Script' screen above:
- The 'Associated Lead' list will populated once the meeting calls are been made.
- Click [Save].
- To import the spreadsheet of the 'Leads', select the 'Meeting' check box as shown below:

- Click [Import] button.
- Click [Load File] button as shown in the screen below:
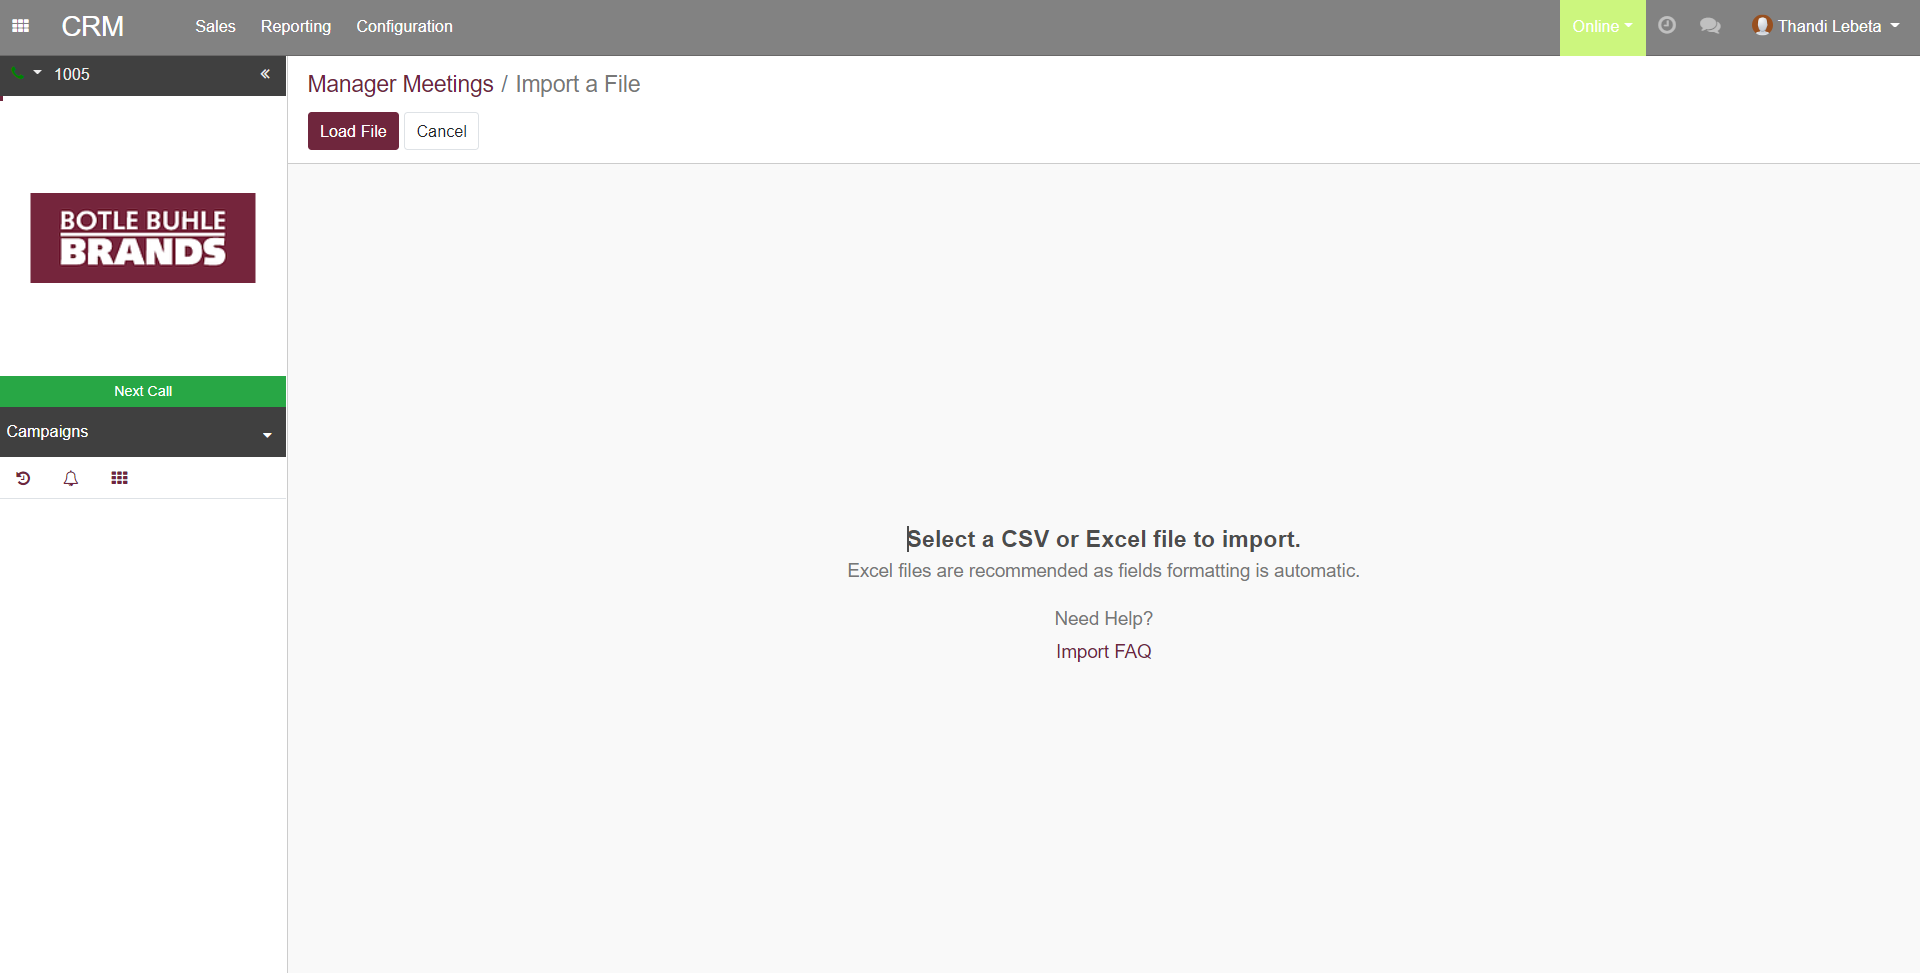
- Click [Test Import] button.
- Click [Import] button.
- The 'Sales Force Meeting' is now configured and ready for the 'Campaign'.
- To log out, go to your profile on the far top right.
- On the dropdown, click [Log out].